Beginner Sonar Settings: Optimize Your Fish Finder to Catch More Fish
Getting the right sonar settings is the fastest way to see clear images, identify fish, and avoid frustration on the water. Many beginners struggle with cluttered screens, missed fish, and unclear structure because their sonar isn’t set up correctly.
In this summary, we’ll cover the most important beginner sonar settings for:
2D / CHIRP sonar
Side Imaging (SideVü)
Down Imaging (ClearVü)
By the end, you’ll know how to adjust gain, frequency, range, speed, and other key settings to make your sonar crystal clear and catch more fish.
SECTION: 2D / CHIRP SONAR SETTINGS
2D sonar is the foundation of every fish finder. For beginners, focus on:
Frequency:
Low (50 kHz) for deep water
High (200 kHz) for shallow water
Gain / Sensitivity:
Start around 50–60%
Adjust until you see fish clearly without clutter
Depth Range:
Auto mode is fine for beginners
Manual range helps focus on target depths
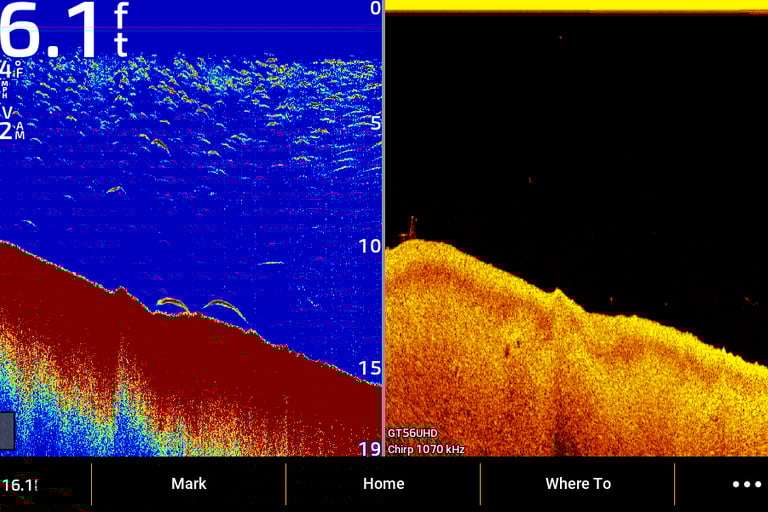
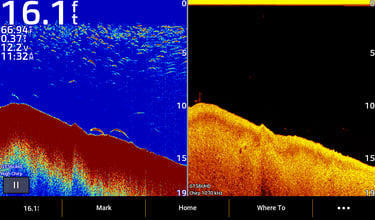
2D CHIRP sonar (left) showing clear fish arches with beginner settings
SECTION: SIDE IMAGING (SIDEVÜ) SETTINGS
Side Imaging gives a wide view of structure and fish. For beginners:
Range: Start with 30–60 ft left and right, adjust based on water depth
Boat Speed: 3–5 mph for clear images
Contrast / Brightness: Moderate – too high can obscure fish, too low can hide structure
Frequency: Use standard 455 kHz for most lakes
Adjust your sensitivity (gain) to avoid clutter and to better see fish and structure
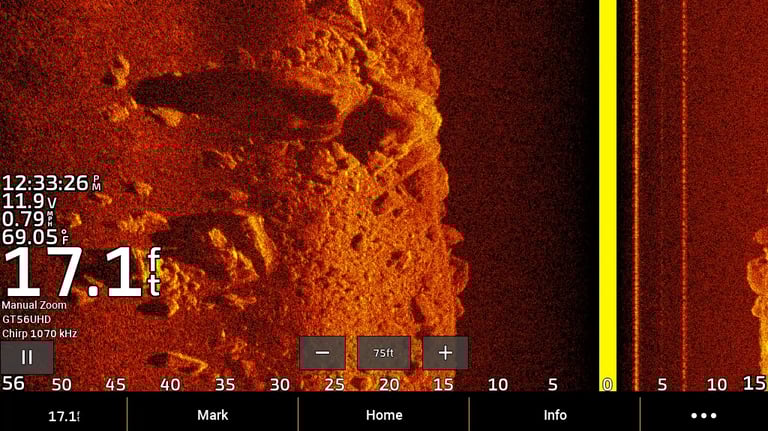
Side Imaging sonar settings for beginner anglers

SECTION: DOWN IMAGING (CLEARVÜ) SETTINGS
Down Imaging is excellent for seeing fish directly under the boat. Beginner tips:
Frequency: Usually 800 kHz for shallow water, 455 kHz for deeper water
Range: Auto mode works, adjust if fish are missed
Contrast: Slightly higher than side imaging to see details
Boat Speed: Slow to moderate for jigging or tight spots
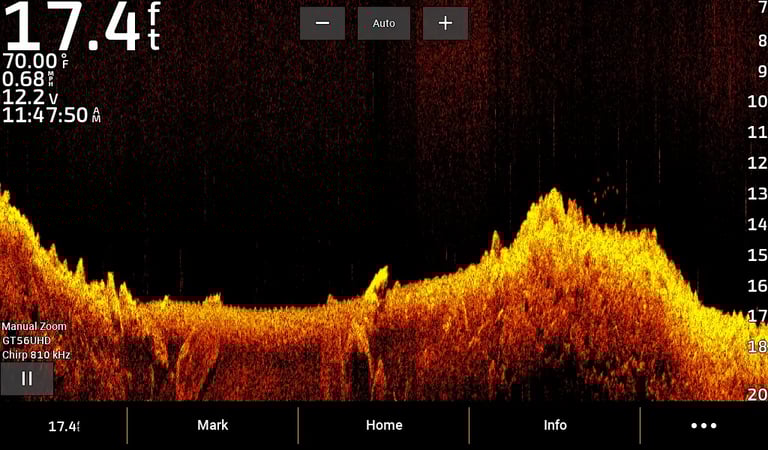

Down Imaging sonar with clear fish visibility
SECTION: COMMON BEGINNER MISTAKES
Many new anglers make these mistakes:
Gain too high: Cluttered screen, hard to see fish
Speed too fast: Blurs images
Wrong frequency: Misses fish in deep or shallow water
Ignoring sonar type: Using 2D only when Side Imaging would help
SECTION: QUICK TIPS
Keep sensitivity moderate
Adjust range depending on depth
Use Side Imaging for structure and edges
Use Down Imaging for vertical jigging or tight spots
Check settings each time you switch lakes or water conditions
Want to learn sonar faster and avoid beginner mistakes? Join me on the water for hands-on sonar training and catch more fish.
Stop guessing and start catching more fish. Book hands-on sonar training and learn directly on the water with a professional guide.